Creating an AWS EC2 instance with Python’s boto3 library
Boto3 – it’s a name you’ve probably heard very often if you’ve worked with AWS and Python. It is the SDK that contains nearly every major AWS service that is currently available with Python.
For this example, we are going to use Boto3 in a script that will provision an EC2 instance in your AWS account. It sounds simple, but there are still a lot of steps that you need to follow to make it happen, so let’s get started. We will now begin by first logging into our AWS account and searching for the Sagemaker service. Let’s dive into it:
- For this exercise, we need a clean environment where we can write Python code but also configure permissions in a terminal. To do this, in my AWS account, I’m going to create something else that we will use down the line: a Sagemaker notebook. A Sagemaker notebook is a Jupyter notebook service run on AWS servers:
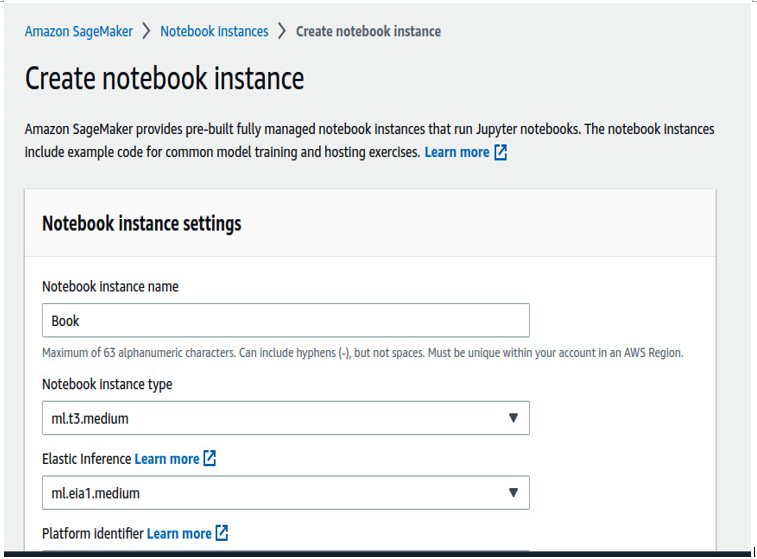
Figure 4.1 – Console to create a notebook instance in Amazon Sagemaker
If you look at the breadcrumb at the top, you can see that the path is Amazon Sagemaker -> Notebook instances -> Create notebook instance.
2. Any smaller notebook is good. We’re using ml.t3.medium for this exercise:

Figure 4.2 – Created notebook
Once your notebook is up and running, click on Open Jupyter to get to your Jupyter IDE. Now, the instance itself will have some AWS permissions because it is an AWS creation, but not enough to provision an EC2 programmatically. It will, however, come pre-installed with boto3 and the AWS CLI.
Important note
If you don’t have them installed, install boto3 with pip and the AWS CLI through AWS’s official website (https://docs.aws.amazon.com/cli/latest/userguide/getting-started-install.html), which contains installers for all operating systems.
3. Now, let’s try and provision the EC2 with the pre-existing Sagemaker role that comes pre-assigned to Sagemaker:
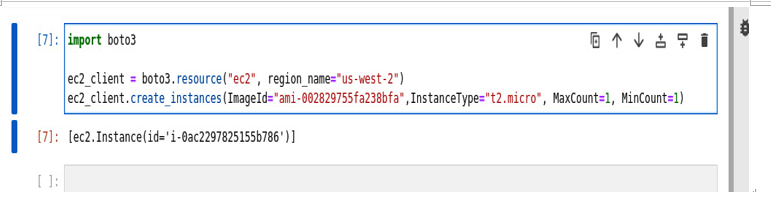
Figure 4.3 – Code to invoke boto3 API
It worked. But, as you see here, the Sagemaker instance already came pre-configured with a role that had EC2 access.. If that had not been the case, you would have had to give the role some permissions or use the AWS CLI to attach a role profile to the instance. But it worked, and that is great. You can view your EC2 instance in your AWS console.
However, there are a few things to note here:
- You always need to define an ImageID (AWS has a public catalog). The one I’m using is AWS’s proprietary Linux version.
- You need to define the instance size and the maximum and minimum number of instances to create.
Now, that was simple and easy to understand, wasn’t it? Well, that’s good. Now we can move on to the concepts that make the provisioning of resources so necessary. Scaling and autoscaling are essential concepts in DevOps and they are both just a matter of provisioning resources.